* We independently evaluate all recommended products and services. If you click on links we provide, we may receive compensation.
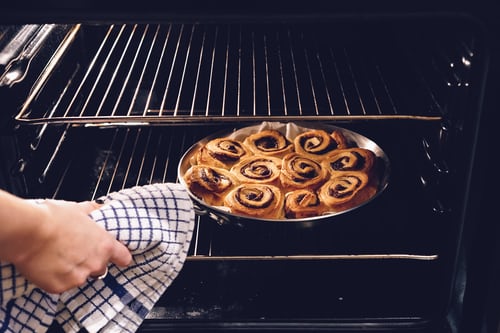
Ovens are perhaps the most important kitchen appliance for bakers. Toaster ovens, wall ovens, convection ovens, etc. are common types of ovens. Even if you are not one, you still probably use an oven on an occasional basis. Regardless, using an oven means there will be a lot of food settles on the oven racks, base, and other crevices. Apart from that grease can also accumulate on the glass window which prevents you from checking up on your food. Thus, cleaning an oven can be a daunting task, but when done right, makes future baking easier and cleaner. Your food also tastes better when baked or grilled inside an oven.
Cleaning an oven is thus, a time taking but rewarding process. In this article, we will break down the process of cleaning an oven with a special emphasis on how to clean oven racks. With the right cleaning process and tools, your oven cleaning can become less daunting.
We will divide this guide into 10 cleaning and maintenance steps so that your oven cleaning is done right. It will also mention the supplies you will need before we begin.
- Cleaning Steps (Steps 1-6)
- Maintenance Steps (Steps 7-10)
Before we begin, here’s a list of the tools and supplies that you will need:
- Paper towel or rag
- Dustpan or dustbin
- Oven Cleaner (optional)
- Baking soda
- Rubber gloves
- Washing powder
- Dryer sheets (optional)
- Cloth
- Dishwasher tablet
- Salt
- Oven liners
Cleaning Steps (Steps 1-6)
Step 1: Remove oven racks
Before you start cleaning the oven, take out all the oven racks and with the help of a rag or paper towel remove the suborn burnt piece of food glued to the base of the oven. Having a dustpan or dustbin handy in this process helps. Try to get rid of all the stubborn pieces as you possibly can. Before proceeding to the next step, make sure the oven is cool.
Step 2: Clean with baking soda
You can start cleaning your oven with a surface or oven cleaner from the market but, the best oven cleaner happens to be a common kitchen item – baking soda. It makes scrubbing and scraping away grease and grime from oven surfaces a very easy task. It is natural and also comparatively very cheap.
Mix half a cup of baking soda with water until it forms a paste. Apply the paste on the base and sides of the oven. Avoid applying it on the heating elements, but make sure you get all other corners and places. Wear rubber gloves for this process as baking soda can sting your fingers.
Leaving the baking soda paste overnight does wonders and makes the oven very easy to clean in the morning.
Step 3: Clean oven racks
The first step was to remove the oven racks, but now we discuss how to clean them. It can seem like the most difficult part of cleaning the oven but is not. Put some washing powder inside a tub or large pan of very hot water and lower the racks into it. Leave them in overnight and you will wake up to easily removable grime in the morning. All you need to do is scrub it away.
You can also use dryer sheets instead of washing powder. Place a couple of dryer sheets in a tub and lower the racks and leave them in overnight. You will wake up to easy-to-scrub grime in the morning, just like with the washing powder. You can also use the wet dryer sheets to scrub it all off.
Step 4: Clean oven glass
Cleaning the oven glass is perhaps the easiest part of cleaning an oven. Apply the same baking soda paste on the inside part of the glass – making sure you get all corners and crevices. Let the paste sit for about half an hour and then use a clean and dry cloth to wipe the window.
You can, however, also purchase a dishwasher tablet. Dip the powdered dishwasher tablet in some hot water and rub it on the glass of the oven. Dip in the water after every swipe and it will easily remove the grime accumulated on the glass.
Step 5: Clean the stovetop
If your oven comes with a stovetop then you might want to clean it with the rest of the oven too. Create a paste using 1 tablespoon of salt, 1 tablespoon of water, and another tablespoon of baking soda. Apply the paste and scrub the stovetop. Wipe with a clean dry cloth – voila!
Step 6: Clean with vinegar and damp cloth
Get a spray bottle, add some vinegar and spritz it all over the areas of the oven with baking soda. Then using a damp cloth, wipe it away. Do the same with the oven racks left overnight. Scrub them first and then, spray the vinegar and clean them again. Place the racks back into the oven.
Maintenance Steps (Steps 7-10)
Once you have cleaned the oven, it is important to make sure it remains clean for a longer time. Here are some steps that can be taken to ensure your oven remains clean for a long time.
Step 7: Get oven liners
Invest in heavy-duty oven liners and place them on the base of the oven. Make sure they fit properly on the base, cut them if necessary. Oven liners are a great investment as they prevent the base from collecting melted grime and food. Plus, they can be reused and cleaned, as well as being dishwasher friendly.
Step 8: Place an old roasting tray
To avoid food pieces from falling at the base, you can also place any old roasting tray at the bottom of the oven.
Step 9: Avoid overfilling the dishes
If you are filling your Pyrex dishes or pans to the brim, then you’re creating extra cleaning work for yourself. Naturally, the food will bubble out and spill outside. Thus, find a more appropriate dish that has sufficient space at the top.
Step 10: Place a lid on the dish
Another way that you can avoid grease and food from accumulating in the oven is by covering your pan or dish with a lid. Simple and easy.