* We independently evaluate all recommended products and services. If you click on links we provide, we may receive compensation.
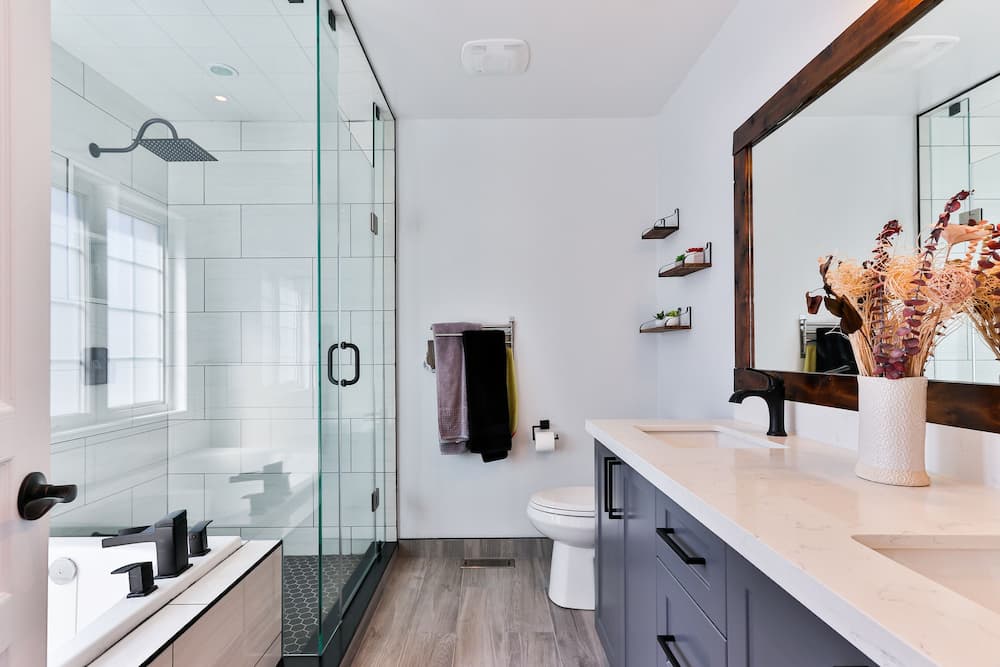
People usually tend to believe that toilets last a lifetime but this is not the case. It is generally advised to replace a toilet after a couple of years for health and cleanliness. The reasons for which you want to replace your toilet could be cosmetic, any defects (leaks or cracks), etc.
Whatever the reason maybe there are some factors you should keep in mind when choosing a new toilet; the two most important ones are the size of the seat and its distance from the wall. Long toilet sites are comfortable but if your bathroom is small you should go for a standard size. The second factor to consider is that the toilet fits in the allocated space. For that before uninstalling your old toilet, measure the distance between the wall and the bolts keeping it together with the floor. Select the new toilet based on these features.
The next task is to install the new toilet. We have divided this guide into three parts; preliminary tasks, removing the old toilet, and installing the new toilet. Both of these have steps of their own which we will explain in detail.
Here is a list of things you will need to replace a toilet:
- Water
- Sponge
- Water Solidifier
- Measuring Tape
- Wrench
- Screwdriver
- Putty Knife
- Flange Repair Kit
- Nuts and Bolts
- Wax Ring
- Gloves
Preliminary Tasks
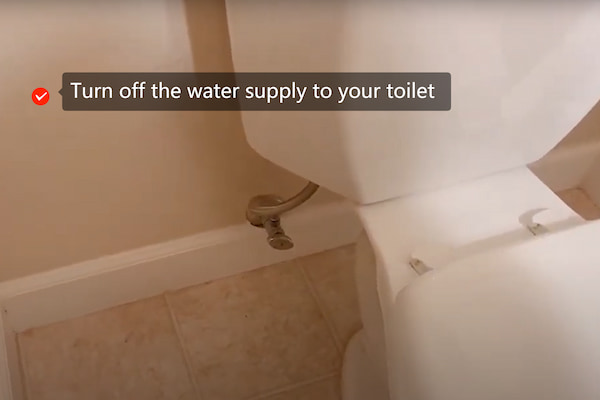

Before you begin the process of installation turn off the water supply to your toilet. It is usually connected to the wall or the floor, find the valve and turn it off. Flush the toilet and keep the handle down to empty the water. To get rid of the water in the tank and the bowl, a sponge and bucket can be used. Another smart way of doing that is to use a ‘water solidifier’. The solidifier crystals will soak up water and can be flushed using the minimum amount of water.
Once you are done emptying the toilet, the task of uninstalling the old toilet begins.
Removing The Old Toilet
You have emptied the toilet and it is ready to be uninstalled now. Follow these steps.
Remove Tank
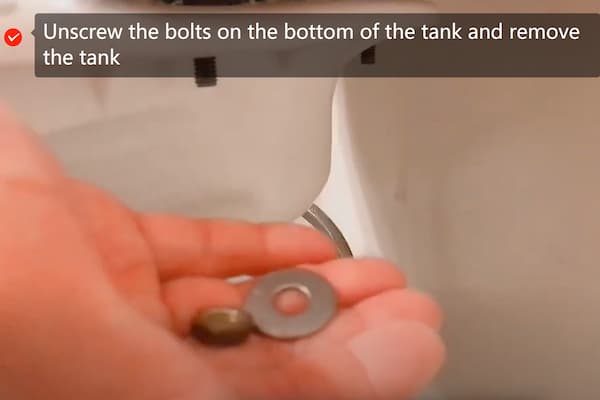
The water supply has been disconnected and the tank is ready to be removed. Place a bucket to catch any water that might fall once you dislodge the tank. Wear gloves and unscrew the bolts on the bottom of the tank, detach them from the bowl.
Uninstall Bowl
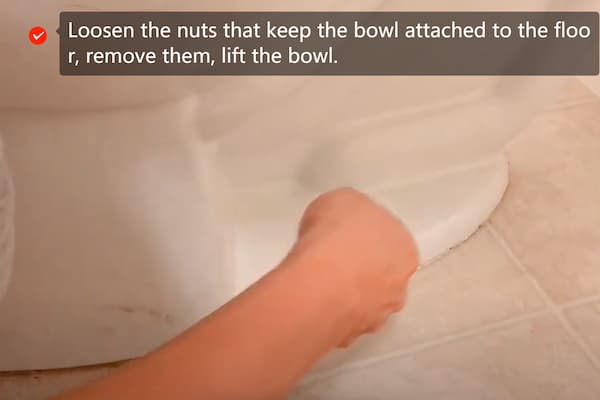
Though you emptied the bowl, still it is better to use a water solidifier to keep any residual water from spilling. Loosen the nuts that keep the bowl attached to the floor, remove them, lift the bowl and discard it safely. It is recommended to wear gloves during this process.
Remove Old Wax Ring
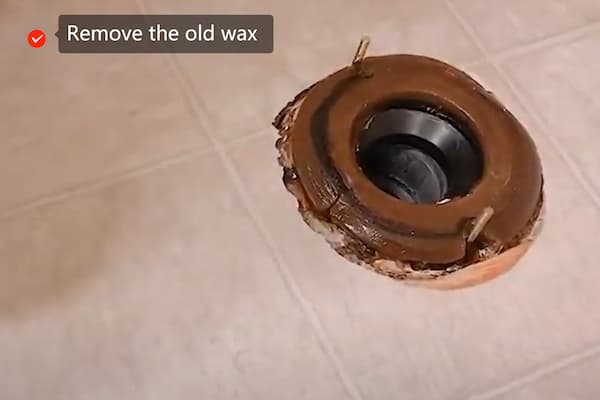
Wax rings can not be reused. To remove the old wax use a putty knife, do not forget to remove any excess wax on the flange. After removing the wax, use a rag to stuff the hole to block the sewer gases and to prevent anything from falling into the drain. These tasks should be done while wearing gloves.
Repair Flange
Remove the old bolts from the flange. Repair it if needed, repair kits can be bought from the market. In case the damage is irreparable, use a replacement flange and discard the old one.
Do keep this thing in mind that the flange should be higher than the floor. To ensure this wax rings and flange spacers are available in the market. Some rings used for this purpose use foam and rubber and they can also be used.
If you are using a flange spacer, use silicone between the flange and the spacer to keep them together. A spacer sits on top of the existing flange.
Here you are done with removing the old toilet.
Installing a New Toilet
Once the flange is in place, the new toilet can be installed. Wear gloves during this process.
Install Bolts
Install new bolts by sliding them into the slots on the flange. Secure them in place by using nuts or washers.
Install Wax Ring
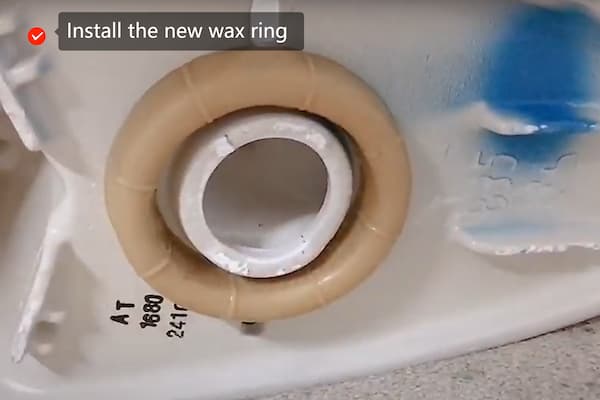
Place the new toilet bowl on a towel in an inverted position. Run warm water on the new wax ring to soften it, press it onto the outlet till it is in place.
Install Bowl
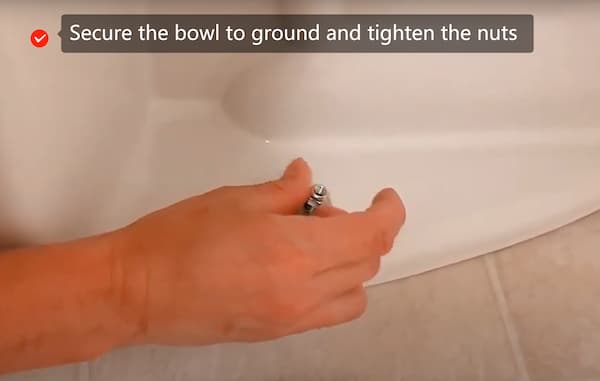
Remove the rag from the drain, lower the bowl onto the nuts. Try to do so vertically without any turbulence so there is no damage to the wax ring. Firmly press to secure the toilet bowl in place. Tighten the nuts, washers, etc. Make sure the cap bases are tight too and the correct side is facing up. Tightening the bolts too much could lead to cracking of the bowl sp avoid that.
Install Tank
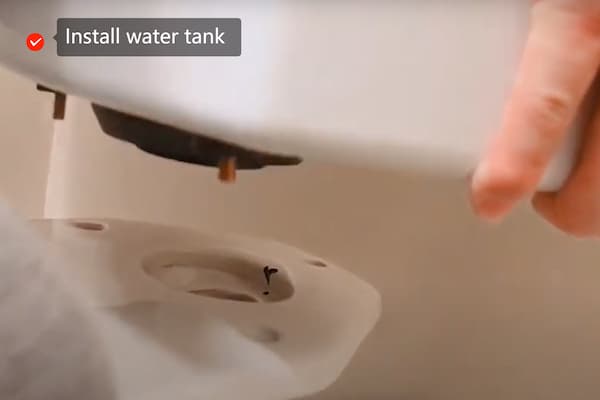
You need to flip over the tank and install bolts that will secure it to the bowl. After doing so, install the rubber gasket on the base. Place the tank in place on the bowl, tighten the nuts with your hands, make sure the tank is in level, then use a wrench to tightly secure the nuts.
Test for Leaks
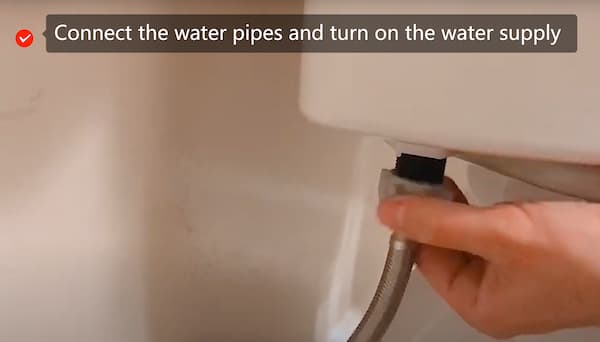
Connect the water pipes and turn on the water supply, check for leaks around the gasket and the supply line. If a leak is found, tighten the bolts. If it does not solve the issue, demount the tank and check the gasket. Flush the toilet a few times, check around the base. If the leakage is from there, the wax ring is not tight enough, replace it with a new one.
Install Seat
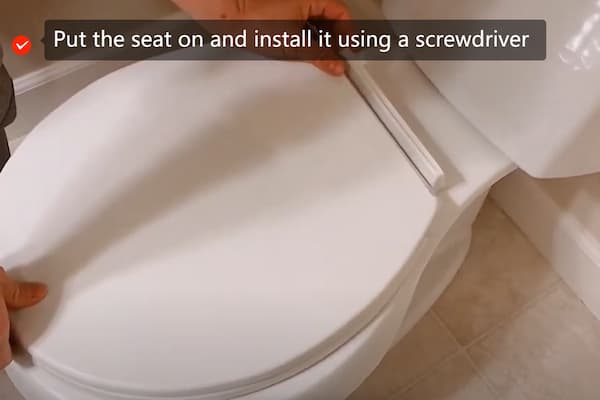
As the last step install the toilet seat using a screwdriver.
Congratulations! You just successfully installed a toilet seat.