* We independently evaluate all recommended products and services. If you click on links we provide, we may receive compensation.
Are you thinking of getting rid of that old piece of furniture made of wood? It's not difficult to give that old wooden table or chair a new lease on life by stripping the previous finish and then applying a fresh coating of color. This article teaches how to repaint wooden furniture by following simple steps to get a smooth result. We have divided the guide into two steps. The first one will show you how to prepare the surface, and in the second, you will learn to apply the paint.
Materials Needed
- Drop Cloth
- Sandpaper, Various Grits
- Spray-On Oil-Based Primer
- Oil-Based Paint
Tools Needed
- Scraper Tool
- Palm Sander
- Tack Cloth
- Nylon Bristle Brush
- Safety Gear
Prepare the Surface (Step 1)
Setting up your space and furniture before painting will ensure a more straightforward process. Follow these tips to help make painting furniture a fun project.
1. Take the drawers and doors off
Take out the shelves, drawers, and any hardware if you plan to paint the insides. Repair any loose joints or putty damaged or dented areas. Sand dried putty with the help of a 220-grit sponge.
2. Test for Lead
Before starting, you must make sure that the coating you're taking off isn't lead paint. You can purchase lead testing kits in your local stores. These guidelines only apply to products with paint that is negative for lead.
3. Clean loose paint
Scrape away any loose paint. Be cautious and try not to scratch the wood by placing it parallel to the wood and applying equal pressure.
4. Sand and clean
If the surface has an existing finish and is smooth, you can sand them using a sanding sponge with 220-grit and clean them up with a damp cloth. If the surface is rough, take a 180- or 220-grit sanding sponge, then wipe them clean. You might need to hand sand to get into the crevices of your furniture. After you're done, clean the furniture using the tack cloth to remove dust.
5. Mask off Areas
Use a painter's tape to wrap the areas you don't intend to paint, like cabinet drawers, the interior of the cabinet, and hinges and hardware that you cannot simply take off.
6. Apply Primer
Utilize a spray primer to get uniform, neat coverage. Select a white primer under light-colored paint and a darker primer for darker color paint to get uniform coverage. Start by spraying the underside of your piece. Spray slowly to create a steady spray pattern to prevent drips and excessive spray. Make an in-and-out movement that follows your furniture's natural line. Apply between 2 and 3 light coats and allow the primer to dry in between applications completely. Make sure you read the label on your primer because drying times are different.
7. Sand, if Needed
If the surface is rough after the primer has dried, you can lightly sand the surface with fine sandpaper, then wipe it with a tack cloth to take off dust.
Painting the Wood Furniture (Step 2)
Change the appearance of your furniture or protect its surfaces by applying paint. Before you start, preview different colors on your actual furniture to find the right match — then follow these steps to apply.
8. Prepare the Work Area
Install your workspace in an area away from the direct sunlight and strong breezes. Make sure you have enough ventilation to help carry out the paint fumes. Allow enough room to walk all around the object you're painting. Vacuum dust and other debris in the area you'll be applying the paint, particularly the floor and overhead lighting. Let the air clear so that dust doesn't settle on the freshly painted surface, and then clean any dust that has settled onto the surface of your wood.
9. Adjust the lighting
Make use of portable, adjustable light. Angle it according to the surface you'll paint. The angle of the light casts shadows to help you spot scratches, runs, or drips.
10. Paint the Furniture
Paint the piece using smooth strokes, following your natural line of the artwork. Choose a high-quality bristle made of nylon for the most effective results. Moreover, repeat the stroke to create an even surface. If you experience drips, lightly move the brush over the area to stop the drip and smooth it out prior to moving ahead. Apply between 2 and 3 light coats and allow the coats to cool completely between coats. Examine the label on the paint bottle as drying times differ based on the paint.
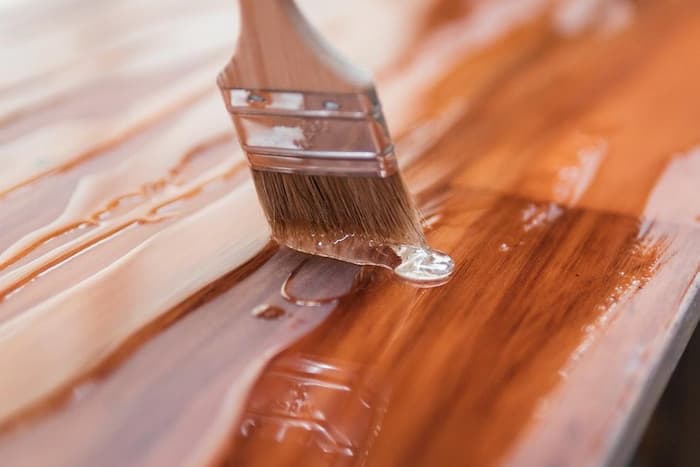
11. Apply Clear Coat
Clear coats of polyurethane provide an additional sheen layer and harden and protect the paint. Mix oil-based topcoats with water-based paint. Place the can 10 to 12 inches away, and spray in a back-and-forth motion. Then follow all the lines that go along with the contours of your furniture to cover the surface evenly. When that first coat is dry, it is good to lightly sand the surface with 200-grit or more sandpaper to create professional results before spraying the last coat.
12. Repair Flaws and Apply Additional Coats
Once the initial coat is dry, examine the paint surface for drips or runs. After thoroughly drying the paint, carefully sand it if you notice any roughness. If you observe paint accumulating on the sandpaper, stop immediately to prevent paint globs from scratching your surface. Another option can be to place a knife blade on the paint surface close to the dried bump of paint. Make sure to tilt it so that the edge cuts off the bump without damaging the surrounding paint. Finally, add a thin coat of paint to hide the damage.
13. Dry it
Allow your furniture to fully cure in a dry, warm, ventilated area before use, usually for up to 24 hours. Once you understand how simple to repaint wooden furniture, you'll discover the potential of any piece of furniture.